Gauges are used in manufacturing environments to make go/no go decisions both during production and prior to moving into full production. Developed simultaneously with the part it will measure, a gauge can require months of engineering effort.
Gauges are designed to enable operators to quickly check production parts based on a predetermined set of measurements. A typical gauge will check a part’s conformance on five to 10 dimensions in order to determine a part’s “state”: acceptable or not acceptable.
Hard Gauges, Hard Costs
While gauges have been invaluable in the manufacturing quality process since the industrial age, they represent certain drawbacks for today’s manufacturers who are under constant pressure to reduce costs and increase efficiencies while maintaining high quality.

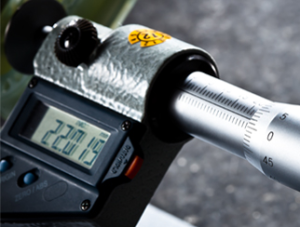
Example of an inspection gauge
Some of these limitations include:
- Costly engineering – Typically, three months of engineering effort is required to design and build a gauge, at a cost of tens of thousands of dollars per gauge.
- Limited measurement capabilities – A single gauge measures a limited number of dimensions for a single part. If “inspection creep” occurs or as customer requirements shift, additional engineering effort is required to modify the gauge.
- Storage and handling – When not in use, gauges must be warehoused. Large gauges may weigh as much as 1,000lbs, so retrieving and setting them up requires special
transport and handling. This is also a consideration during annual calibration as each gauge must be retrieved to be calibrated.
Virtual Gauges Reduce Costs, Increase Efficiencies

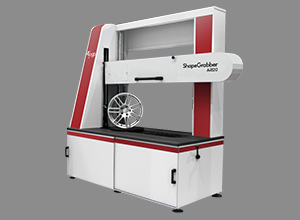
ShapeGrabber Ai820 Automated Industrial 3D Scanner
Newer, automated 3D scanning technologies can today replace costly, cumbersome inspection gauges. An automated 3D laser scanner such as that manufactured by ShapeGrabber enables multiple inspection projects (virtual gauges) to be set up in software – this typically requires 4-8 hours of technician effort.
In minutes, the entire surface of each part is scanned – not just a few points – so the inspection project can be easily modified. Once a virtual gauge is set up, an operator simply places the part in the scanner and selects the appropriate inspection project – the automated scanner does the rest.
Virtualizing gauges with a 3D scanner offers these
advantages:
- Multiple inspection gauges available on a single 3D scanner.
- Automates complete part comparison to CAD model or known good part, providing data in minutes.
- Measures unlimited number of dimensions at any time.
- Reduces initial design & build time from 3 months to just hours.
- Eliminates need to retrieve and set up hard gauge for each production run.
These advantages translate into significant cost and efficiency benefits:
- Slash costs, including those associated with:
- Designing and manufacturing hard gauges. For large gauges, this may amount to tens of thousands of dollars in savings per gauge.
- Storing/warehousing large gauges.
- Transporting and setting up large gauges.
- Calibration of gauges.
- Increase production efficiencies. Eliminate delays due to time-consuming gauge
modifications, late delivery of gauges, or faulty gauges. - Improve quality and customer responsiveness. With a virtual gauge, there is no limit to the dimensions that can be inspected and measured. When “inspection creep” occurs, or as customer requirements shift, there are no large costs associated with measuring new dimensions.
- Reduce human error. Automation requires reduces the need for operator manipulation and subjectivity. Automatic reporting is fast and makes go/no go decisions fast and easy.
Please contact ShapeGrabber for more information or to request a sample part scan.
