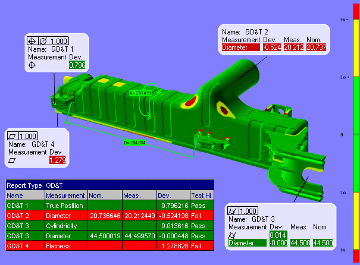
Performing a thorough First Article Inspection (FAI) on new production parts is the norm across most industries, but the methods and tools used for FAI vary greatly. Recently, manufacturers have adopted 3D scanners as their main tool for FAI.
Unlike traditional measurement equipment that relies on the capture of a few individual points in succession, a non-contact 3-D scanner captures millions of data points and represents the true geometry of the component. Automated 3D scanners can take measurements within a matter of minutes and require little human involvement, freeing the operator to perform other tasks.
Using an Automated 3D Scanner for First Article Inspection
Automated 3D scanners such as ShapeGrabber scanners are ideal for First Article Inspection for the following reasons:
- They are fast: Accurate measurements can be obtained in a few minutes.
- They are thorough: The complete surface geometry for the part is captured, not just a few pre-determined points. This data can be used for spec by spec dimensioning, geometric dimensioning and tolerancing (GD&T) measurements and global direct to CAD comparisons.
- They handle complex parts: Compound Curves and complex shapes aren’t a problem.
- They are automated: Parts are measured in a repeatable way, with minimal operator involvement. Results are consistent and reports are automatically generated.
If you’re looking to speed First Article Inspection for your complex-shaped parts, contact ShapeGrabber to learn how an automated 3D scanner can improve the efficiency of your quality inspection program.
